The Best Shed Ramp Materials
Table of Contents

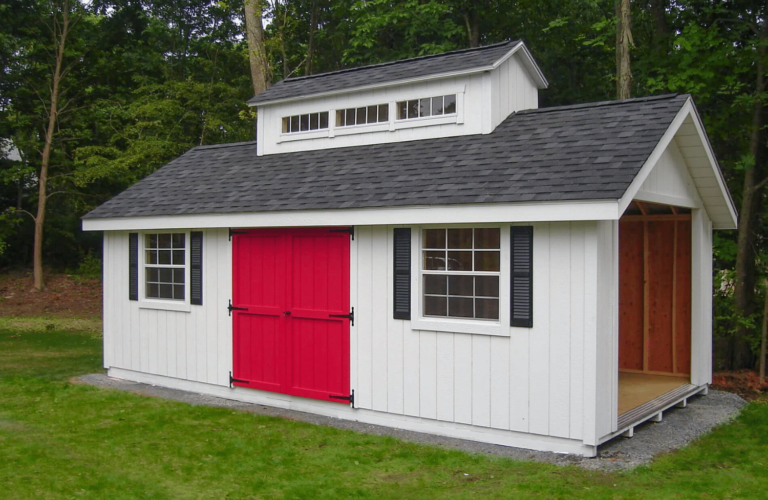
A shed ramp can seem like a small addition to a shed, but it makes a huge difference, especially if you use your shed to store larger equipment. If you built your shed without a ramp or bought one without considering a ramp option, you might regret your decision when it’s time to pull the lawn mower out. We’re here to help and guide you step by step in building your own shed ramp without any hassle or stress!
What Can You Build A Shed Ramp With?
There are 3 main materials you can build your shed ramp with.
- Wooden Shed Ramps are the most common and most affordable option. You can build or buy a quality wooden ramp for $200-$500.
- Aluminum Shed Ramp. Aluminum shed ramps are pricier compared to wooden ramps but are more durable. Due to these ramps being more heavy-duty, you can expect to pay around $500-$750 for a good aluminum ramp.
- Concrete Shed Ramps are the most expensive material used for shed ramps but are the most durable. Almost 99% of the time, you won’t need such heavy material for a simple backyard shed, but you can expect to pay anywhere from $600-$1000 for a concrete shed ramp.
It is important to have a shed ramp for easier access to heavy equipment and getting tools in and out of the shed.
Each of these materials has its own advantages and disadvantages. So when thinking about purchasing either of these materials, consider the pros and cons for all of them. Here are some advantages and disadvantages of each of the above-listed materials.
Wooden Shed Ramps

Advantages
- Affordable: Wooden shed ramps are normally cheaper than concrete or aluminum shed ramps.
- Flexible: You can easily customize wooden ramps to fit your specific needs.
- Easy to work with: You can easily cut and shape wooden ramps however to fit necessary.
- Aesthetically pleasing: You can easily paint or stain the wood to complement the exterior of the shed.
Disadvantages
- Limited weight capacity: Depending on the weight of the equipment or tools, wooden shed ramps may not be able to support heavier weight loads.
- Maintenance: This requires regular maintenance, which might include staining and sealing to prevent splintering and rot.
- Vulnerable to weather damage: Wooden ramps could easily be damaged by weather, including warping and cracking.
- Shorter lifespan: Might need to be replaced more frequently than concrete or aluminum shed ramps.
Aluminum Shed Ramps
Advantages
- Durable: Aluminum can withstand rust and corrosion
- Low maintenance: Aluminum doesn’t require a lot of maintenance. They can also be resistant to a variety of weather conditions.
- Lightweight: They’re easy to install and maneuver.
- Higher weight capacity: They can support heavier weight loads compared to wooden ramps.
Disadvantages
- Limited customization: Because they come in standard sizes and shapes, there is a limitation to the ability to customize aluminum ramps to fit your needs.
- More expensive: Generally more expensive compared to wooden shed ramps.
- Slippery: When wet, aluminum ramps can be slippery, which makes them potentially dangerous.
- Not as aesthetically pleasing: There isn’t much to do to them to make them more appealing.
Concrete Shed Ramps
Advantages
- High-weight capacity: Concrete ramps are ideal for large sheds and equipment; they can support extremely heavy loads.
- Fire-resistant: They can’t catch on fire, which can help protect the sheds and the contents inside the shed.
- Low maintenance: They do not require a lot of maintenance. They are also resistant to harsh weather conditions and pests and do not need to be painted or sealed.
- Durable: With proper installation and maintenance, they can last for many years.
Disadvantages
- Difficult to customize: Concrete ramps cannot be easily modified or adjusted once it’s installed.
- Time-consuming: It can take longer to install concrete ramps, and it will require professional equipment and expertise.
- Expensive: Due to the cost of materials and professional installation, concrete ramps are generally the most expensive option.
- Aesthetics: In certain settings, concrete ramps might not be as aesthetically pleasing compared to wooden or aluminum ramps.
Installing A Shed Ramp – Step-by-Step
Step 1: Planning

Like any DIY project, before you get started, make sure you’ve done the necessary research and planning. Ask yourself how much weight the ramp will have to hold up. What are you keeping in your shed? What is your budget? How much time can you invest in this project? Once you’ve answered all of these questions, you are ready to move on to the next step.
Step 2: Make The Right Measurements

Once you’ve fully committed to your shed ramp project, the next step is the take the correct measurements. This starts with measuring your shed’s door width. This will be the width of your ramp. Once you have correctly measured your shed ramp width, you will need to measure its length. Based on your foundation, the height of your shed and grade elevation might differ You can do this with any measuring tool.
Step 3: Gather Supplies
For this guide, we will be going through the process of building a wooden shed ramp. The materials needed for this build are as follows.
- Tape Measure
- Drill
- Exterior Screws
- Circular Saw
- Pressure Treated Lumber
Aside from any safety equipment, these are the main materials and equipment needed when you’re building a wooden shed ramp.
Step 4: Clear The Ramp Area
Clean the area where you’re going to place the shed ramp. Remove any debris or obstructions from the ground. If necessary, level the ground.
Step 5: Lay Out The Ramp Base

Use a measuring tape to ensure that the base of the ramp is placed at the correct distance. Measure the distance from the floor of the shed to the ground where the door opens to determine the length of the ramp.
Step 6: Place Materials
Cut out the lumber to the necessary size and attach them to the framing. Do so by using screws and nails. Use a saw to cut the material according to the correct length and width. For wood, attach the framing lumber using wood screws, and ensure to drill the pilot holes first.
Step 7: Level The Ramp
Make sure that the ramp is leveled and secure. Check to see if the ramp is leveled from side to side and front to back. If not level, add additional shims or framing to level it.
Step 8: Sanding The Edges

Sand the edges of the ramp material, making sure there is a smooth surface for walking or rolling equipment. Use the needed equipment to smooth out any rough edges on the ramp.
Step 9: Protecting The Ramp
Apply protective coating or stain to the wooden ramp. This will help prevent harsh weather damage.
Step 10: Test The Ramp
Walk or roll equipment up and down the ramp to test it out to ensure that it is sturdy and safe. Use heavy objects to make sure that the ramp can support the weight. Adjust the ramp, if necessary, to make sure it’s safe.
Sheds & shed Ramps In MA

Are you looking for a way to enhance your living space? Look no further than our durable and functional backyard sheds. We offer four collections for our storage sheds to choose from. Our sheds are built with high-quality materials to ensure a long-lasting structure. View our collection of aesthetically pleasing storage sheds.